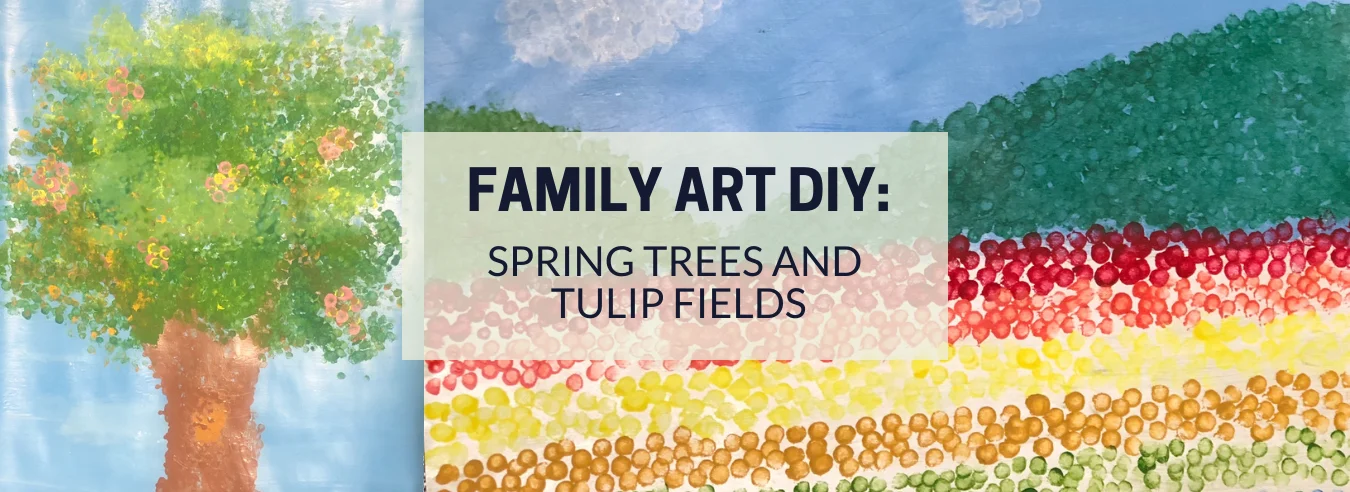
With spring in the air, one usually thinks of the flowers and trees in bloom. We have two step-by-step guides for DIY art projects that will bring the beauty of spring indoors. These crafts are simple and fun for the whole family to create together. To make things easier, they also only require supplies that you likely already have at home. Let’s get started!
Supplies needed for both art projects:
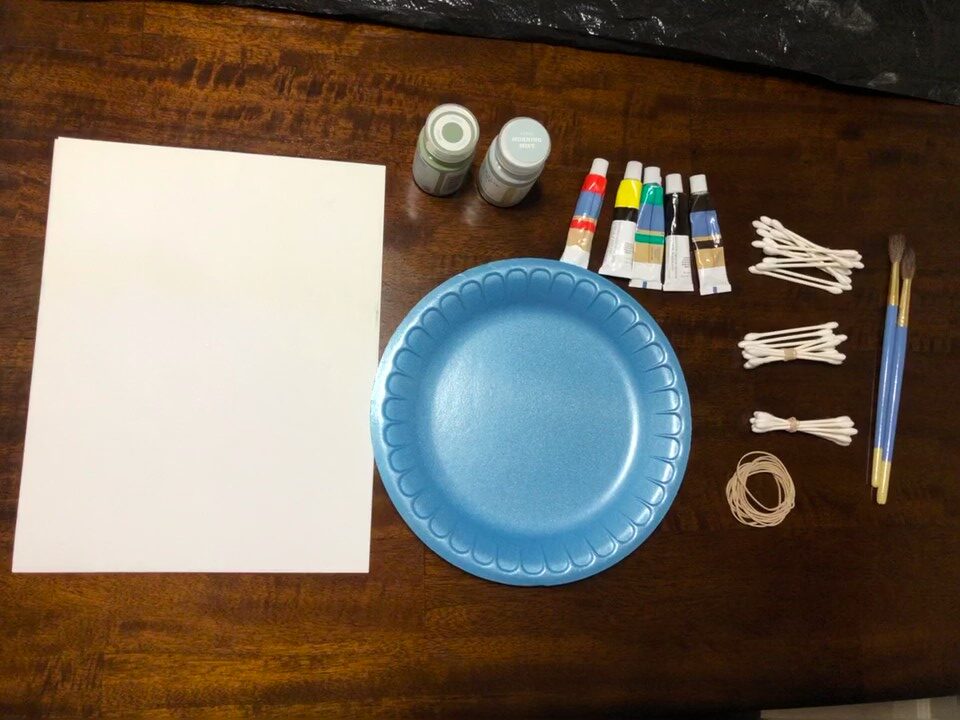
- 5”x11” white paper
- Paint
- Paint brushes
- Q-tips
- Rubber bands
- Paper plates
- Pencil
- Ruler or anything with a straight edge
- Trash bag or newspaper
Setting Up
Before you begin, place either a trash bag or newspaper pages on top of your work surface. This will make the clean up a breeze. Once the work surface is covered, arrange all the supplies on top. To start, make Q-tip bundles by grouping seven of them together and securing them with a rubber band. Then, place small amounts of each paint color onto the paper plates. We will start with the tulip fields art project first.
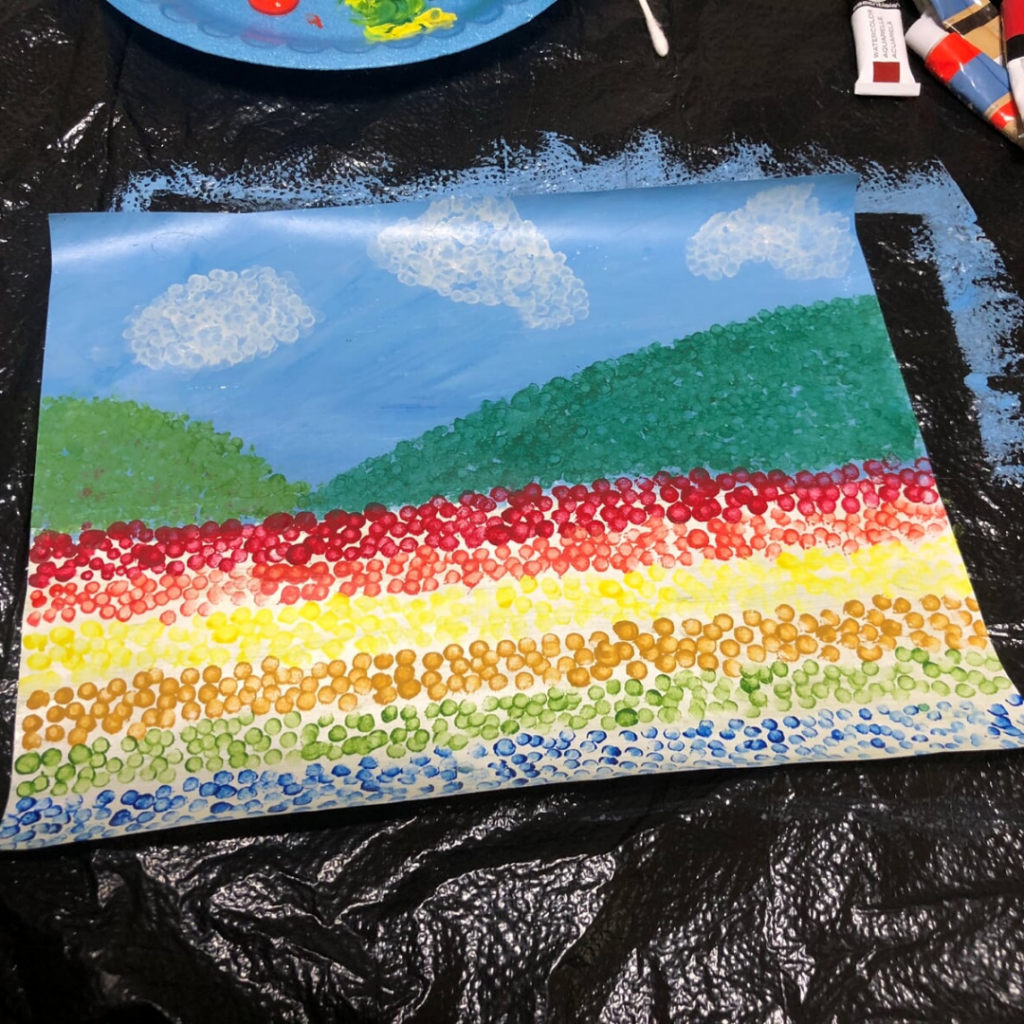
Tulip Fields
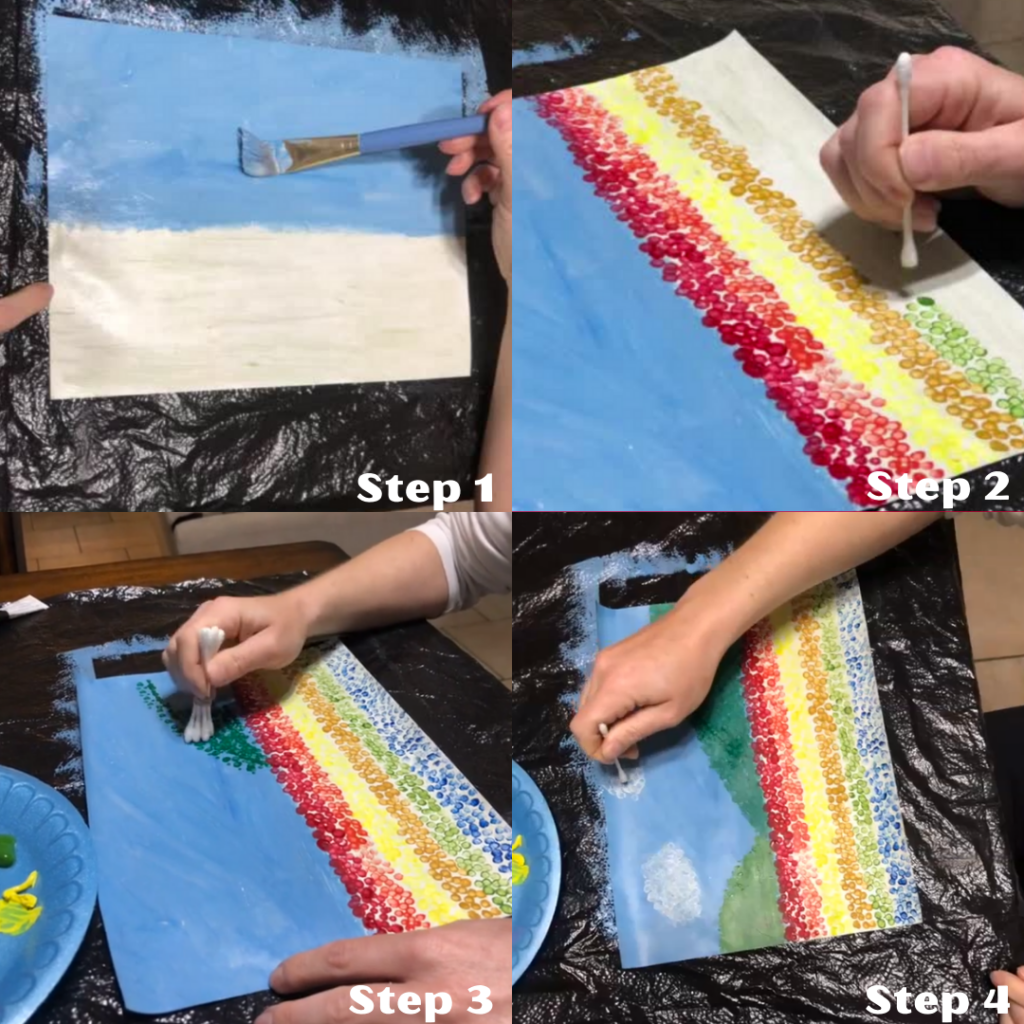
Step 1
Place the piece of white paper horizontally in front of you. Using a pencil, draw a line in the middle from left to right, making a top and bottom section. Next, using a paint brush paint the top half sky blue and the bottom half green. Once this is done, wait until the paint has dried before continuing.
Step 2
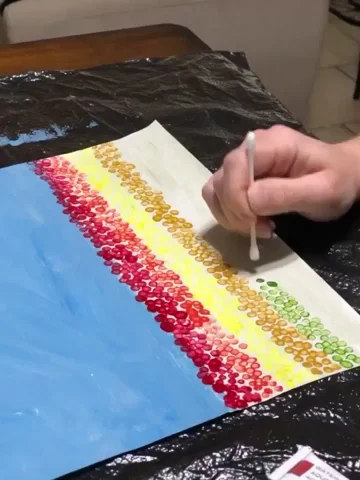
After it has dried, take a single Q-tip and dip it in any paint color that you would like for a flower. Using the same repetitive up and down motion, make a row of dots, beginning at the top of the green section.
Step 3
Next, use another single Q-tip and dip it in another flower shade of paint, and create another row of dots below that one. Continue in this manner until the bottom half of the page is covered in different color flower dots. Then, dip a Q-tip bundle in green paint and create two rolling hills, starting just above the flowers.
Step 4
Lastly, using another Q-tip bundle, create a few fluffy clouds in the sky. You have just created a stunning flower field landscape!
Spring Trees
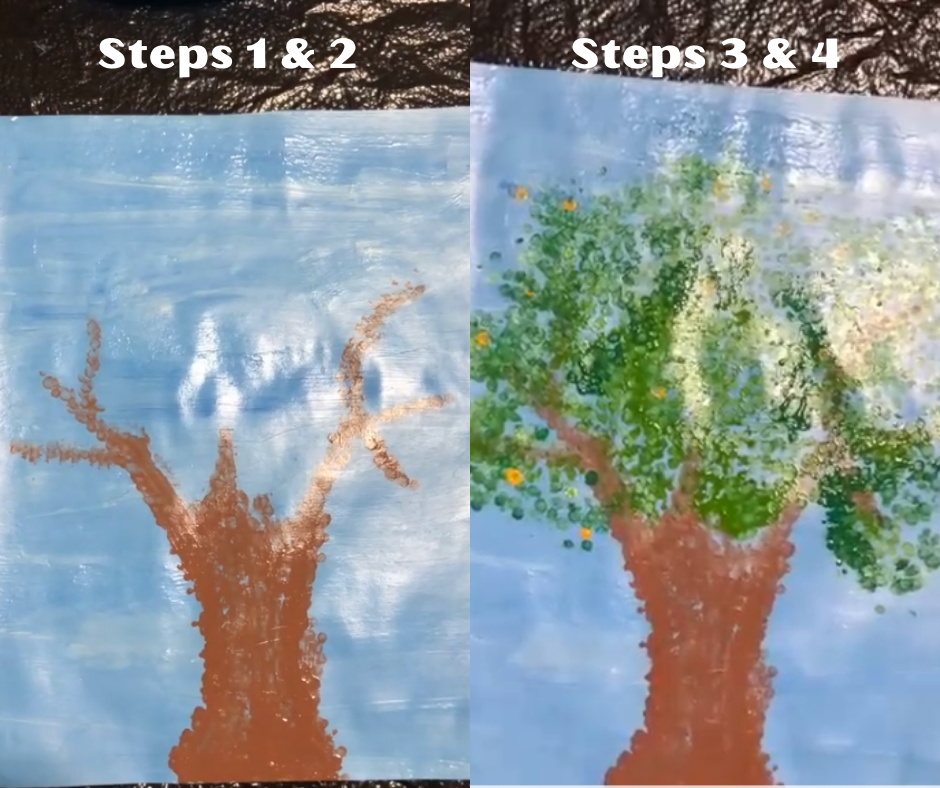
Place the piece of white paper vertically in front of you. Using a paint brush, paint the entire page sky blue. Once this is done, wait until the paint has dried before continuing. After it has dried, grab a Q-tip bundle and dip it in brown paint. Using a repetitive up and down motion, create a tree trunk and branches using the bundle. Once the foundation of the tree is to your liking, let it dry for a few minutes. Next, using another bundle dipped in green paint, begin to paint the leaves on the tree. To add depth, add a lighter green and/or yellow for additional leaves. Let that dry for a few minutes as well. Lastly, using a bundle dipped in pink or purple paint, add sections of flowering blooms to the tree. You have now created a beautiful, blooming spring tree!
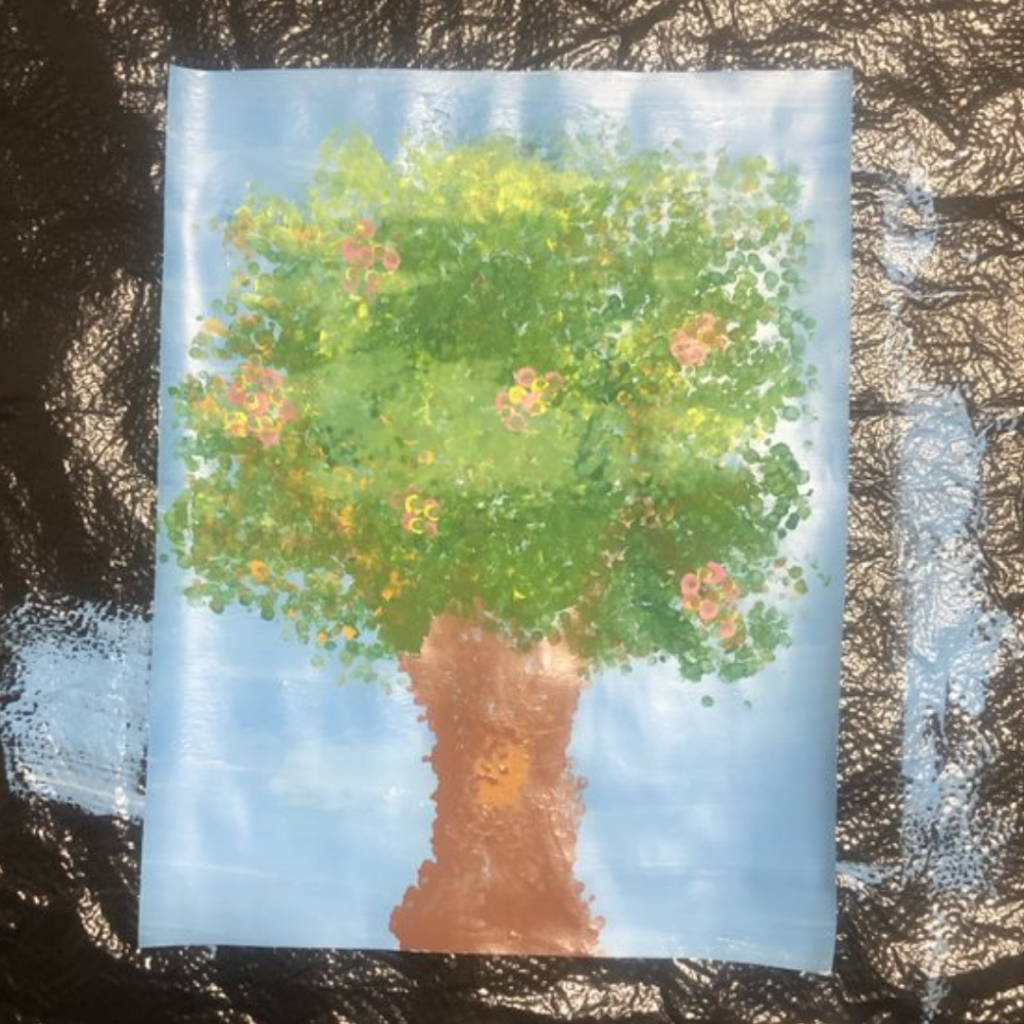
These colorful and cheery masterpieces are sure to brighten up your home. Enjoy the beauty and renewal that this season brings together with your loved ones, both indoors and out!
Related Posts